
So, you need an adventurous 2 week Patagonia itinerary. I’ll tell you now, you’ve made a fantastic choice to plan a trip to Patagonia! Visiting Patagonia may just be one of the best decisions of my life, and I don’t think I will ever get over the incredible views and scenery I saw here while doing some of the most scenic hiking and trekking in Patagonia – the best in the world.
This 2 week Patagonia itinerary will take you through some of the best places in both Chilean Patagonia and Argentinian Patagonia (Chile and Argentina), in the southern part of both regions.
More specifically, you’ll see Punta Arenas, Puerto Natales, Torres del Paine National Park, El Calafate, El Chalten/Cerro Torre, and a few sights in Los Glaciares National Park. These are the most famous must-sees in Patagonia.
These places are where the most dramatic and impressive mountains stand sentinel over tiny wooded towns in Chile and Argentina, and thin blankets of snow cover arid landscapes along remote mountain roads.


What to Expect from this Patagonia Itinerary
This itinerary involves lots of hiking trails – the W Trek in Torres del Paine, the Fitz Roy trek and possibly Laguna Torre treks in El Chalten, and the Perito Moreno glacier in El Calafate. It’s a classic route for first-timers to Patagonia and can be combined with my northern Patagonia itinerary to make a one month in Patagonia if desired.
This 2 week Patagonia itinerary is more of a freestyle guideline where you can ‘choose your own adventure.’ I will suggest activities and accommodation and you can select what is best for you. This Patagonia itinerary is the exact 2 weeks that I spent when I was there, so I know it’s possible!
You will want to plan many of these tours out beforehand, so follow the links I have included if you want my best tips on companies to book with. This is true especially for the W Trek, because the refugios book up very quickly. This route does not include Ushuaia in Argentina, so make sure to add some time if you’s like to go there too.
But First – Why Not Check Out Some More Patagonia/Argentina and Chile Content? (These Open in a New Tab!)
- A complete guide to Buenos Aires
- My Torres del Paine W Trek – Triumph and Struggle
- San Pedro de Atacame Chile Guide
- A Guide to the Salta + Jujuy regions of Northern Argentina


When is the Best time to Go to Patagonia?
You may be wondering what time of year is the best to take a trip to Patagonia. Honestly, pretty much any time of year is great for 2 weeks in Patagonia because each season has its benefits in both Chile and Argentina.
Weather is unpredictable all year, especially in Torres del Paine, so there’s no way to get around possible inclement weather. However, here’s my rundown of each season in Patagonia.
Summer in Patagonia is the most ideal because temperatures will be far warmer. Summer is the best for camping but is also very crowded.
Autumn in Patagonia is when I went, and I honestly believe this to be the best season to go. I’m not kidding when I say I have NEVER seen fall colors as I did in Patagonia. It is definitely colder and camping is not a good idea at this time of year, but if you don’t mind a bit of cold, the color is worth it a million times over. Read more about autumn in Patagonia.
Winter in Patagonia is probably not the best idea. Refugios close around early to mid-May, and there are only a few companies (including ChileTour Patagonia) that will organize camping in the winter. But it will be freezing!
Spring in Patagonia would also be an ideal and slightly less crowded time to visit Patagonia. Flowers bloom (on all the trees that turn bright colors in the autumn) between spring and summer, which is another amazing sight to see along any trek. It will still be chilly!
What to Know About the W Trek
I have included the 5 day/4 night Torres del Paine W trek in this Patagonia Itinerary because it’s one of the most famous treks in the world and presents some of the best views Patagonia can offer. It’s truly an adventurer’s dream!
You should have your W Trek planned out far before you arrive in Puerto Natales. The refugios and campsites book up quickly, especially in summer. For this reason, you’ll want to either book a tour that reserves everything for you, or reserve your spots as soon as you can.
I have included links to book the refugios and campsites below, so you can check if your dates are currently available. Make sure to also know what to pack for hiking in Patagonia.
Campsites book up less quickly than refugios, however, and are often far more accessible at the last minute. You can do some research on the hiking trails and plan it out yourself, or check out my Torres del Paine W Trek post that I did with ChileTour Patagonia, a company that I loved and was fairly affordable compared to other companies.


Patagonia Itinerary Day 1-2: Fly Into Punta Arenas, Chile
Once you arrive in Punta Arenas, settle in and rest! Depending on your flight arrival time you may have more or less time in the city, but use it to spend the day getting accustomed to Patagonian weather and beat any jet lag you may have before traveling in Patagonia.
Getting to Punta Arenas
There are very cheap flights to Punta Arenas from Santiago, the capital of Chile. Santiago is the easiest place to fly into; you can get here from many places in South America, North America, and even direct from Australia. Check Aerolineas Argentina, LATAM, and more. From there, you can get another cheap flight down to Punta Arenas.
I booked my flight to Punta Arenas less than a month before, and it came out to around $72 with a bag (even cheaper if you book in advance)! This is the cheapest airport to fly into in Southern Patagonia.


Where to Stay in Punta Arenas:
Comfort Accommodation in Punta Arenas:
Hotel Almasur Punta Arenas (Prev. Hotel Rey Don Felipe) is a beautiful hotel right in the center of town, with an amazing hot buffet breakfast that was absolutely to-die-for! There was a lovely view from the window, and I woke up each morning to the sun shining over the beautiful and colorful city.
They have an all-day snack menu or a fancy dinner menu at their fully equipped restaurant. We even tried a classic Patagonian ‘Calafate Sour’ as a welcome drink! The staff were always so helpful and their common space was a perfect place for me to catch up on work.
Budget Accommodation in Punta Arenas:
There are a few hostels in Punta Arenas for backpackers. I recommend Hospedaje Magallanes.
Patagonia Itinerary Day 1: Rest, relax, explore Punta Arenas, and prepare yourself!
Today, depending on what time you fly in, you might have an entire day or just an evening in Punta Arenas to begin your trip to Patagonia. You can spend the day walking around town, shopping for any trekking/mountain supplies/clothes you may need, finding $1 street empanadas, and walking down to the shore to see the ‘Patagonian Penguins.”
You can check out some of the cute cafe’s, shop at the markets along the streets (where I got my hat I wore all throughout Patagonia!), find a nice restaurant for dinner, and get adjusted to the jet lag, because it’ll be go-go-go from here!
Patagonia Itinerary Day 2: Day Tour to Tierra del Fuego to see the Penguins!
Depending on the time of year, you can book a day tour from Punta Arenas going south to the Isla Tierra del Fuego to see some Antarctic Magellan penguins! There are usually tours each day, but check to make sure there are tours and that it’s the right time of year for penguins. Book a tour in advance here!
This tour will take you on a ferry to Porvinir from Punta Arenas, to the penguins for a few hours, and the up to some historical sites in San Gregorio and a few other points of interest. It’s not quite a visit to the arctic circle without seeing some real live penguins now, is it?!
Another option is to spend the day taking a tour to Magdalena Island from Punta Arenas. This is a bit closer (only a half-day tour) and is another great place to see penguins.


View the rest of my photo album from Puerto Natales: click here!
Patagonia Itinerary Day 3: Get To Puerto Natales + Prepare for the W Trek
Now it’s time to start making your way north to the closest town to Torres del Paine!
Getting to Puerto Natales from Punta Arenas
Grab a bus at any time from Punta Arenas to Puerto Natales! The bus station is right in town in Punta Arenas, and is within walking distance from any accommodation in the center. It should take about 3 hours, and there are multiple busses each day.
Once you arrive in Puerto Natales, you’ll be at the bus station about 2km from the center of town. You can get a taxi for about 1500 pesos to pretty much anywhere in the center, or just walk it!
Where to Stay in Puerto Natales
Puerto Natales and Torres del Paine cater very well to the luxury traveler, so there are quite a few amazing places to stay (including one of the top hotels on the continent!). There are also a lot of backpacker hostels.
I stayed in the guesthouse of ChileTour Patagonia (the W Trek company I used) because our whole tour was run from there (and meals included) but here are some ideas for both the budget and comfort traveler.
Comfort Accommodation in Puerto Natales:
- The Singular Patagonia: This hotel is just outside of Puerto Natales town and is one of the top rated on the continent! Surrounded by beautiful ranch land and on the edge of a lake, The Singular presents all rooms with an incredible view along with spa facilities, an amazing restaurant, a pool, casino, wellness center, and more. If you have extra time and money…
- Hotel Costaustralis: This hotel is constructed in an old style and is right in the center of town. All rooms will look out to the lake and be within walking distance of everything.
- Remota Hotel: This lovely space is both architecturally creative and has all the amenities you could need for a luxurious stay – including a warm pool with a mountain view!
- Tierra Patagonia: This is a bit farther outside the city, but is uber-luxurious and closer to Torres del Paine.
Budget Accommodation in Puerto Natales:
- Hostel Last Hope: a great community vibe hostel in a lovely old wooden house.
- The Singing Lamb Backpackers: Clean and homey space for backpackers to socialize and plan treks


Preparing for the W Trek (and Exploring Town)
First of all, make sure you’re ready for your big trek! As you will have seen in my Torres del Paine W Trek post, the weather is very unpredictable and you should be prepared for the worst, just in case.
If you must, you can rent lots of supplies from your hiking company or shops around town. This includes all kinds of camping gear if you choose to camp, hiking poles (recommended), hiking shoes, hiking pants, gloves, and jackets for the hiking trails.
Apart from making sure you’re ready to trek, you should walk around town a bit. Puerto Natales is a beautiful and cozy little town with lots of beautiful sculptures along the water. Explore some of the shops, cafes, and bars, and walk along the water. The sunset could be great over the lake if you get a clear day! Chile also has cheap good wine and also artisanal beer – but maybe you should wait until after the trek to try it!
Most people visit Puerto Natales to get to Torres del Paine, but you can also ride bikes around the town and also take a glacier boat tour. For those who do not want to do the whole 5 days in the national park, there are also full day tours to Torres del Paine from Puerto Natales if you don’t have much time.
What You Will Need for the W Trek
- Clothing:
- Sweat absorbent bottom layer – Women’s / Men’s
- Fleece/down middle layer – like this one. To be layered with
- Waterproof top layer jacket with hood – Women’s / Men’s
- Exercise tights/pants and waterproof hiking/rain pants
- Waterproof hiking boots
- Multiple pairs of woolen socks
- Plastic rain poncho
- Gloves (one pair for warmth and/or another thicker waterproof pair for protection)
- Warm hat/beanie
- Sunglasses
- Scarf
- Gear/Supplies:
- Backpacking backpack with a waterproof cover (35-45L ideal)
- Hiking poles
- Camera/GoPro
- extra plastic bags for keeping things dry
- make sure to travel with a headlamp whether camping or not!
- Food/Drink:
- Thermos Bottle to fill with hot coffee in the morning and water later on (an idea that I loved)
- Reusable water bottle
- Food/Drink Ideas for Patagonia campers:
- snacks (fruit, chocolate bars, muesli bars)
- oatmeal for breakfast
- sandwich supplies for lunch
- pasta and veggies for dinner
- Supplies/Gear for camping:
- Tent (waterproof and able to withstand wind/elements)
- Sleeping bag suitable for freezing temperatures
- Inflatable pillow
- String/line to hang wet clothes
- Water bottle to fill with warm water for inside sleeping bag
- Changes of clothes
[click_to_tweet tweet=”Classic Patagonia Itinerary: 2 Weeks of Hiking and Adventure with both Chilean and Argentinian Patagonian Highlights” quote=”Classic Patagonia Itinerary: 2 Weeks of Hiking and Adventure with both Chilean and Argentinian Patagonian Highlights”]


Patagonia Itinerary Days 4-8: W Trek in Torres del Paine National Park
All tour companies plan the W trek differently, and there are trekkers going both from right to left on the hiking trails and from left to right. To keep it easy I’m going to list the way I did the trek for this Patagonia itinerary, but keep in mind you can do it both ways.
You can look at a trail map (they give you one upon entry) for specific trekking instructions; I have simply listed out the order and points of interest to make a more complete Patagonia itinerary. You can also see my post for my experience each day.
As far as food goes, full board is available from all refugios, which I recommend. It’s pricey, but is much easier in my eyes than carting around cooking/food supplies to cook in the camping areas. If you have full board, there will be hot Chilean breakfast each morning, a packed lunch, and a hot three-course dinner served each evening. It’s lush, and it’s awesome.
Torres del Paine is a place to splurge for many people. However, the camping areas pretty much all have functional kitchens as well. It’s up to you!
For some inspo, here are some views you will see in Torres del Paine:

Getting to To Torres del Paine from Puerto Natales
There are lots of buses to the National Park from Puerto Natales. If you have an organized tour, your transport may be accounted for. If not, you can purchase a ticket to the park on any of many regular busses.
For day 1 of the W trek, you’ll want to get the earliest bus you can to the National Park entrance (where you will pay about $35USD entry) and then to the first refugio, Refugio Las Torres.


Patagonia Itinerary Day 4 (W Trek Day 1): Mirador de Las Torres
After arriving at Refugio Las Torres, it’s time to begin one of the most exciting days of the trip to Patagonia! Put your things away (aka set up your tent or find your room/dorm bed) and get going – you have a long way to go! It’s a big plus, however, that you can leave your heavy things at the bottom today.
Today you will hike about 22km round trip to the most famous view of the trek, the base of the towers (Mirador de las Torres). This day has the most vertical gain, which you get over with while your legs are fresh. You’re welcome.
Refugios on the way: You can stop at Refugio Chileno, which is 5km in, to grab a snack or drink if you need.
Comfort Accommodation Day 1 W Trek:
- Hotel Las Torres: This is the ONLY luxury hotel in Torres del Paine National Park – so if you have the funds, splurge! It’s super nice and has a beautiful view. The famous towers hike starts from it as well.
Budget Accommodation Day 1 W Trek:
- Refugio Torre Central – This is a very nice refugio with great heating, comfy dorm beds, lockers, and towels included. The food is great too!
- Camping Torre Central – outside the refugio with access to amenities


Patagonia Itinerary Day 5 (W Trek Day 2): Trek to Valle Frances
Today you walk approx. 14-15km along a beautiful lake to Refugio Frances. This day doesn’t have any specific viewpoints but is beautiful throughout. It’s more of a transit day so you can position yourself well to ascend the French Valley tomorrow, going along the first bottom curve of the ‘W.’
You have the water on your left nearly all day, and if the weather is nice you’ll see the famous mountains above you! You will go across beaches, over rivers, and up and down hills, with plenty of photo ops.
Refugios on the way: Refugio Los Cuernos is about 4km from Frances – a perfect place to stop for lunch.
Accommodation Day 2 W Trek:
Tonight you stay in Duomos Frances – dorms in three massive green domes on the hillside – or camping Frances. This refugio is a lot smaller than Torre Central and was really cold for us in fall – bundle up!


Patagonia Itinerary Day 6 (W Trek Day 3): French Valley + Mirador Brittanica to Paine Grande
Today is another long day! Today you ascend the second massive viewpoint of the trek – mirador Brittanica. That is, if there isn’t a snowstorm like there was when I went (have you read my post yet?!). There are two lookout points (miradores): the French and British Lookout (Mirador Frances and Mirador Brittanica). I hope you’ll be able to see them! All I saw was a LOT of grey 😛
After you trek up to the viewpoints, you come back down again and head to Paine Grande refugio. When you reach the bottom, you have about 7.5km to go along the lake to reach the next refugio, Paine Grande.
Refugios on the way: You can leave your bags at a campsite at the bottom of the valley called Italiano. Most trekkers do this – they pack a day bag for the ascent and leave their heavy things at the bottom until they return down the middle straight of the W.
Note: if you don’t want to do the whole thing and are after some more remote luxury, you can head back after today and stay few nights at another luxurious hotel on the other side of the park called Hotel Lago Grey.
Accommodation Day 3 W Trek:
- Paine Grande Lodge is one of the bigger refugios, with lots of space to hang out inside. It has a camping area and dorm rooms. They don’t turn the heat on until 5pm, which we learned the hard way after being turned around from the French Valley!
- Paine Grande Camping is outside the lodge and against the hillside, with access to amenities.


Patagonia Itinerary Day 7 (W Trek Day 4): Paine Grande to Refugio Grey + Grey Glacier + Hanging Bridges
Today you make your way 11km up the last stretch of the W, to Refugio Grey. This leg of the trek is beautiful, and after a few kilometers, you will get a view of the massive and incredible Grey Glacier. But, the real treat happens once you get there.
If you trek a few extra hours from Refugio Grey (and leave your heavy stuff behind), you can get much closer to the glacier and cross two incredible hanging bridges with views of the glacier. The first bridge is after about 45 more minutes, and the second is about that far from the first. DO THIS! I can’t stress it enough. This was my first clear day of the trek, and had some of the best views I’ve ever seen in my life.
Accommodation Day 4 W Trek:
- Refugio Grey is a bit smaller and does not have heating in each room. Like the rest, it does have a full bar and great food. We had live Chilean music too!
- Camping Grey is located within the trees near the refugio. They had good amenities, like a shop and a kitchen.


Patagonia Itinerary Day 8 (W Trek Day 5): Refugio Grey to Paine Grande + Catamaran to bus to Puerto Natales
Today you head back down the straight of the W you went up the day before, back to Paine Grande. You did it! To get out, you must take a catamaran from Paine Grande back to the other side of the park, where busses pick you up to go back to Puerto Natales.
Want my expert adventurer advice? Get back to Paine Grande for an early-ish catamaran – the 11:30 one is ideal (so make sure you begin hiking before 8!).
Once the catamaran gets to Pudeto, don’t take the busses straight away – wait until the later bus (for me this was at 7:20pm), and do an extra trek to another viewpoint called Mirador Los Cuernos. I was the only one of my group to do this, and it was incredible! Even after 5 days trekking, it was so worth it – what’s an extra 7km anyways?!
You walk past a waterfall and past some incredible bays to get to a viewpoint that directly faces ALL of the mountains you just trekked past. You can see the Las Torres peaks and the Paine Grande peaks, and if you have a zoom lens or binoculars you can even see the little green Duomos Frances.
It’s a pretty epic way to end your time in Torres del Paine and is one of the best views of the whole week. I saved my lunch to have on a beach that looked right out to the mountains, and had a wonderful few hours of solitude.
Getting Back to Puerto Natales from Torres del Paine
Again, busses pick you up right from the catamaran and go straight to Puerto Natales (after stopping at the park entrance first as well). While booking your trek you should get this bus booked as well, or any trekking company would figure it out for you as well.
Accommodation
You’re back in Puerto Natales – GET SOME SLEEP! Rest those tired legs, you deserve it. You can book another night in the same place you booked for your other night in Puerto Natales.



Patagonia Itinerary Days 9-11: El Calafate
Now it’s time to head to Argentinian Patagonia for the hiking and adventures offered there. First stop is less full-on and should give your legs a break before more trekking!
Getting to El Calafate from Puerto Natales
There are at least a few busses daily to El Calafate from Puerto Natales – more in high season. This bus will cross the border into Argentina (make sure you have the proper visa before you depart!) after the first hour or so, and take about 5 hours total to reach El Calafate.
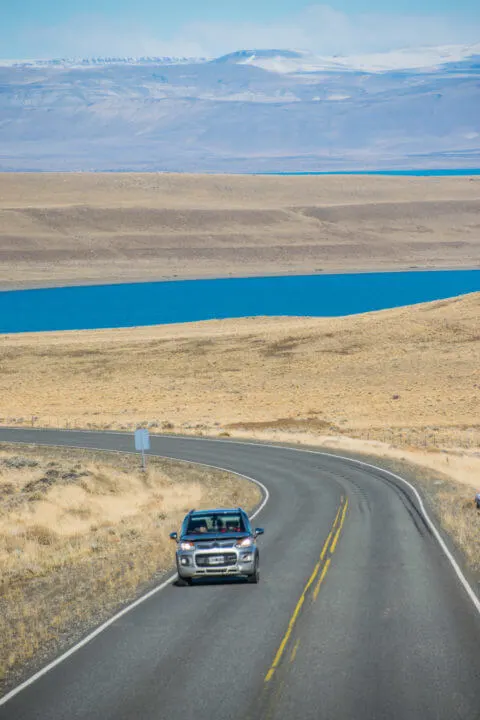
You’ll be traveling the famous Argentinian Ruta 40, which crosses some arid and beautiful land. Make sure to spend some time taking in the scenery between naps!
The El Calafate bus station is up the hill from town, about a 10-15 minute walk from the center. You can get a taxi or opt to walk. The taxis use a meter and the driver approximated 150 pesos to us (about $7USD) , which was very high for a 15-minute walk. So… we walked!
Where to Stay in El Calafate
El Calafate really has it all when it comes to accommodation options. It caters very well to the luxury tourist, but also has some really incredible hostels that seem like hotels! Here are my picks:
Comfort Accommodation in El Calafate:
- Mirador Del Lago: This lovely hotel is just outside town and, like its name suggests, has a view of the lake. It has all the luxurious amenities you could need.
- Xelena Hotel + Suites: beautiful 5 star accommodation with a great view of the bay that El Calafate sits on.
- Hotel Kosten Aike: A large and beautiful hotel property somehow nestled right in the center of town. Has a mountain lodge feel and nice spaces to relax.
Budget Accommodation in El Calafate:
- America Del Sur Hostel: America Del Sur hostel is located up on the hillside with a lovely view of the town, which is also about a 10-15 minute walk away. They have a lovely homey space with a fire and often have live music and Argentinian BBQ’s. Also very clean and all 4-bed dorms.
- Folk Hostel El Calafate: This is a new hostel in 2018 right by the bus station with great amenities. It’s more affordable than other hostels in the area as well.
- Calafate Hostel – This hostel is right in the center of town and is very well known and popular. The location couldn’t be better and they have a nice space as well.


Patagonia Itinerary Day 9: Bus Ride, relax, and check out the town
After your bus arrives, you may have some time after finding your accommodation to check out the amazing little town. People say there’s not much to do in El Calafate, but personally, I really loved the little town.
There’s lots of shopping to do, lots of bakeries (Argentinian chocolate and alfajores – helloooo!), restaurants for any budget, and many cafes with wifi! Use this day to treat yourself to a nice dinner or grab a beer in town, getting to know it a little.
Patagonia Itinerary Day 10: Perito Moreno Glacier Tour
El Calafate is best known for its proximity to the southern part of Los Glaciares National Park, or even better yet, the Perito Moreno Glacier. I know I said the Grey Glacier in Torres del Paine was incredible, which it is, but this glacier is on another level entirely. It’s simply mind-blowing, and I can’t find adequate words to describe it.
It’s massive and stretches on for so many miles you can’t perceive the distance anymore. It’s 50-70m tall, which you can only fully comprehend when you realize that the tiny dot next to it is a two-story boat.
You can choose from a few different tours to the Perito Moreno glacier.
Option 1: One is a basic tour, which will take you to the viewing area and give you a few hours to explore the marked boardwalks. Don’t worry – you could walk all these boardwalks 10x over and it would still not compare to the walking you’ve just done. I wouldn’t do that to you!
After a few hours, you’ll have the option to take an hour-long boat tour up close to the glacier. You can opt to take this boat tour for an extra $25, and you go as close as safely possible to the 50-70m tall glacier. You can’t go too close, though, because as one of the most active glaciers in the area, pieces fall off every 20 minutes!
Option 2: You can actually trek on the glacier if you are so inclined. There are tours that take you to a special part of the jagged glacier where you can put crampons on and actually walk on it, and check out some glacier caves too.
Patagonia Itinerary Day 11: Optional El Calafate Tours
Luckily for you, I actually wrote an entire post about El Calafate Day Trips because it’s such an adventure hub in Southerm Patagonia! You can go ziplining, 4x4ing, hiking, biking, boating to two different other glaciers, explore a beautiful estate in the national park called Estancia Christina, or do a few other boat tours on the arms (brazos) of the national park lakes. Click the image below to see what else is available in this city!


Check out all my photos of El Chalten right here!
Patagonia Itinerary Days 12-14: El Chalten + Cerro Torre
Now that you’ve had a few days of rest (aka not trekking 20k+ km), it’s time to get back into it! El Chalten has quite a few adventures and treks, and you’ll be spoilt for choice here just like in El Calafate.
Most of the hikes here can be done as day hikes and are free, which sets it apart from El Calafate and especially Torres del Paine. The Fitz Roy and Cerro Torre Mountains Peaks (dividing Chile and Argentina) will be visible. Here are my picks!
Getting to El Chalten from El Calafate
There are multiple busses a day from El Calafate to El Chalten, which take about three hours. Busses will stop at the main bus station in El Calafate, which is slightly out of town, but will also often stop at the end of town outside Rancho Grande Hostel. Ask your driver!
Where to Stay in El Chalten
Like everywhere else in Patagonia, El Chalten has great luxury options with budget ones to balance it out. Here are my picks:
Comfort Accommodation in El Chalten
- Los Cerros Boutique Hotel + Spa: Situated on the hilltop overlooking the town, Los Cerros is a fantastic luxurious choice in El Chalten. As its name suggests, it also has a spa (you might be in need of a massage or ten after all your hiking!), lovely spaces, and fantastic views.
- Estancia La Quinta: Located quite far outside of the town, this is the option for people who prefer to feel removed from it all and have the feeling of truly being out in the middle of the Patagonian landscape – but still with luxury amenities.
- Infinito Sur: Located right in the center of town, Infinito Sur provides the amenities and comforts of a hotel but at a more affordable price.
Budget Accommodation in El Chalten
- Rancho Grande Hostel: Rancho Grande is kind of the hostel to stay in El Chalten. It’s at the end of the main road, many busses will stop outside, and it has a bar/restaurant open 24h.
- Aylen Aike Hostel: A smaller family-run hostel with a helpful staff and community vibe. Also on the central street.


Patagonia Itinerary Day 12: Transit to El Chalten
Today you can opt to take one last morning tour in El Calafate before getting a bus to El Chalten, or grab an early bus to have a half a day in the adorable little town. Again, the ride is about three hours. El Chalten is a bit smaller than El Calafate, and just as cute!
There’s one main road bordered by most hotels, hostels, restaurants, shops, and cafes. You can explore the town or chill out and watch a movie – you have a big day ahead!
Patagonia Itinerary Day 13: Mt Fitz Roy Laguna de Los Tres Trek
The FitzRoy Trek to Laguna de Los Tres was one of the highlights of my Patagonia Itinerary for sure. We received a top tip from a hostel worker the night before, to wake up before sunrise and hike the first 4km to watch the sun come up over Lago Capri.
We were going to trek from a different place (El Pilar) to make the hike a one-way deal rather than a round trip. But instead, we took his advice that the hike is different on the way up than on the way down, and that there are different arms of the trail we can take too.
Fast forward to sunrise (8:45 am in fall): this was the BEST advice ever. I got to the lake to find a completely perfect reflection of Mt Fitz Roy on an equally perfect windless day.
I was already mind blown when the snowy mountaintops slowly started to turn PINK when the sun started coming up, getting more and more intense and turning a golden yellow and the sun rose. It was …. ridiculous. It was insane. It was everything. It was nature in its purest form. It was… I don’t even know.


After staying for the sunrise, you have 6-7 more km to go to reach Laguna de Los Tres. All of these kilometers are fairly flat and manageable until the last one… where it is completely the opposite. The last km is icy, vertical, slippery, dangerous, and intense. But, IT WILL BE WORTH IT! Hiking poles are a great idea for this, and watch your footing and watch out for ice.
This is where I did one of the most ridiculous thins I’ve ever done, pictured in the photo above. Yes, it was freezing, and yes, it’s silly. But the photo turned out pretty rad now didn’t it?! Oh, the things we do for the ‘gram.
On the way back down, make sure to take the pathway that goes toward the ‘mirador’ which is different than the path that crosses the Lago Capri, just for some variety in your life.
Patagonia Itinerary Day 14: Optional other El Chalten Adventures
Now, on the last day of this 2 week Patagonia Itinerary, you have another free choice on whether you’d like to continue the adventure or rest. There’s another amazing hike in El Chalten called Laguna Torre that you can reach from town, which is much easier (less vertical) and has amazing views of Fitz Roy.
Depending on the time of year, you can also do lots of adventure activities in El Chalten, like rafting, ice trekking, climbing lessons, and kayak and canoe trips. Choose which one sounds best for you!


After Patagonia Itinerary
Well, that’s 14 days! This completes your 2 week Patagonia Itinerary, and from here you have a few options:
Finish Your Trip – Flying Out
- Back to Punta Arenas: You can catch 3 busses back to Punta Arenas to fly out of there, in the opposite order as you did before. Punta Arenas is the cheapest to fly out of and would be easy to buy round trip tickets from if this is the end of your travels.
- Fly out of El Calafate: El Calafate also has an airport, but it’s much more expensive. Depending on your further travels, you can look at flights from El Calafate to skip out on a few more hours on a bus getting back to Punta Arenas. Check Aerolineas Argentinas, LATAM, and more.
Continue Going North
If you are traveling on, you can continue north from El Chalten. There are a few options here (best understood while looking at Google Maps):
- Bus to Bariloche/El Bolson: Most backpackers take a LONG bus from here to Bariloche or El Bolson, especially later in the season. This skips out on a lot of the middle of Patagonia. There is not much between El Chalten and El Bolson in Argentinian Patagonia, besides the beautiful Route 40.
- Back to Chilean Patagonia: However, if you went back into Chile, many people travel/drive/hitchhike the Carretera Austral up Chilean Patagonia, the Route 7. This is a beautiful and scenic road which, unlike the Route 40, has many possible stops along the way.
- You could go back into Chile at Chile Chico (bus from El Chalten) if it’s in high season, and travel up to Puerto Montt and Isla Chiloe from there. From there you could go to Bariloche and El Bolson.
- If you cross into Chile Chico, you could visit the Marble Caves in Chile which seem awesome, and continue of the Carretera Austral through some more awesome National Parks.
OR, you could simply get the 24-hour bus from El Chalten to El Bolson, and go from there. Check my Northern Patagonia Highlights Itinerary for info on where to go from El Bolson!


PHEW! I hope I didn’t inundate you with too much information there. If you enjoyed my Patagonia Itinerary, please leave a comment below, share it, or Pin it to your Pinterest boards! I would appreciate it a LOT 🙂
More South America Content:
- Cafayate, Argentina Itinerary
- What to Do in Buenos Aires
- Argentina Bukcet List: 50 Things to Do
- Guide to visiting Salta + Jujuy
- Riding the Tren a Las Nubes in Salta


Don’t forget to check out my photography website for more Patagonia photography and textures!

Passionate, full-time travel blogger with over 230k on social media and 150kMPV blog. Extraordinary photographer with two DSLR's + a drone with a love for capturing candid moments, epic drone shots, and magical compositions. I'm a natural-born content creator originally from California, but I've been on the road for 9 years living, working, traveling, blogging, and photographing my way around the world. I recommend the most amazingly adventurous and unique + boutique travel experiences/stays and helpful products to my audience and write comprehensive guides on my website that have helped millions of travelers so far. I love to inspire people to plan their dream trips, and many readers have given feedback as such. The reach on my platforms continues to soar, especially when combining cutting-edge social content with optimized articles on my high-authority website.
Mendoza Wine Tasting with Mendoza Wine Camp: More than Just Malbec
Tuesday 19th of June 2018
[…] about from our amazing tour guide and owner of Mendoza Wine Camp, Adam. Having previously been in southern Patagonia for two weeks and northern Patagonia for two weeks, I had not learned too much about Argentina’s history. […]
Two Week Northern Patagonia Highlights Itinerary: Bariloche to Pucon - Adventures & Sunsets
Saturday 16th of June 2018
[…] this two week northern Patagonia Itinerary by itself, or you can also do it as a continuation of my classic Patagonia Itinerary. The classic itinerary takes place in the southern part of Patagonia, between Torres del Paine, El […]
Top Things to do in El Calafate in Argentina's Patagonia
Thursday 14th of June 2018
[…] Continuing through Patagonia? Check out this two-week classic Patagonia itinerary. […]
Nafisa Habib
Saturday 2nd of June 2018
WOW, what a mind-blowing destination!!!! Completely loving every landscape.. A perfect spot to photograph a lot. Nice to know all about Patagonia!
KimmConn
Monday 4th of June 2018
It's truly a photographer's paradise! Thanks so much!
Amy Fujimoto
Saturday 2nd of June 2018
Oh my, aren't you cold in that bikini shot?? Lol. Looks like a ton of fun though, what a beautiful (and cold) spot! I'd love to make it out here one day!